
do it yourself - manicure
Saturday, April 28, 2012
At least once a week I like to treat myself a DIY manicure. I try set at least an hour aside to sit down and treat my hands to a little pampering session.
The great thing about this manicure is that it isn't going to break the bank, in fact you can pick up many if not all of the items needed at your local boots/superdrug/sasa/drugstore etc. Alos, you can add/subtract steps according to how much time you have/how much pampering you feel you deserve!

STEP 1: Load one of your favourite TV shows or movies.
I think thats it's really important to not rush a manicure if you want to come out the other end without any smudges. The best way to do this is to avoid using your fingers at all costs. Let's not forget - we can use this excuse to catch up on all of our favourite shows (The Big Bang Theory FTW!) without feeling too bad as we can kill 2 birds with 1 stone!

STEP 2: Remove all traces of nail polish.
Even if you don't have any on, give your nails a quick swipe with some nail polish remover to strip any oils on the surface of your nails. I know this sounds bad but it will help your nail polish to adhere and last longer.

STEP 3: (Trim), file, smooth, buff and polish your nails.
I love these 4-sided nail files, and you can get them super cheap anywhere. They really improve the surface of your nails and again help the nail polish to adhere, therefore making it last longer. I got mine for about £1 at superdrug and despite using it hundreds of times, its still going strong! I also like to get a nail brush and use it to clean the underside of my nails.

STEP 4: Use a cuticle oil.
I use one by OPI but really any will do. Try to avoid the actual nail area and massage the oil into your cuticles. It will moisturise them and keep them healthy :) Then I like to use one of those stick-things to push back my cuticles. If you need to, you can also trim your cuticles.

STEP 5: Add a base coat.
Depending on your nails, you can either use a normal base coat or a strengthening one. Due to the cold weather here in the UK and all the washing up I have to do - I like to use a strengthening one. Again, this will keep your nails healthy and make your nail polish last longer.

STEP 6: Add your colour!
Try and keep the coats thin, it will allow the coats to dry faster and you are less likely to smudge them! Depending on the polish, I usually like to add 2-3 coats of polish (this is Models Own 'Utopia'). Remember to let them completely dry!

STEP 7 (Optional): Add your second colour!
Try and keep the coats thin, it will allow the coats to dry faster and you are less likely to smudge them! Depending on the polish, I usually like to add 2-3 coats of polish (1-2 for a glitter polish, this one is Models Own 'Pink Fizz'). Remember to let them completely dry!


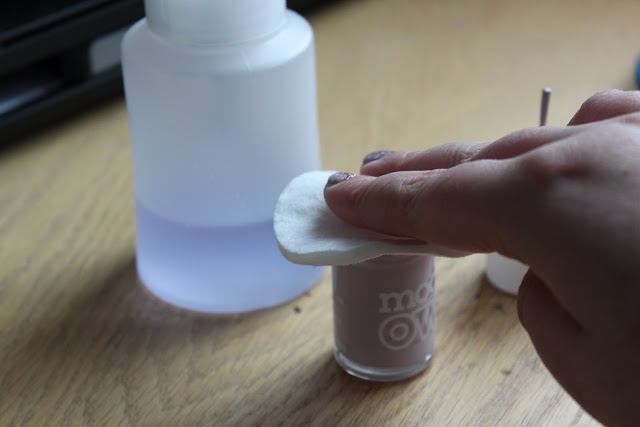
STEP 9: Clean your polishes.
Many people forget to do this, but it's really important! If you soak a cotton bud in nail polish remover and clean the tip of your polish bottle then it will remove any wet or dry polish and make the bottles a lot easier to open!

Et, Voila!


The great thing about this manicure is that it isn't going to break the bank, in fact you can pick up many if not all of the items needed at your local boots/superdrug/sasa/drugstore etc. Alos, you can add/subtract steps according to how much time you have/how much pampering you feel you deserve!

STEP 1: Load one of your favourite TV shows or movies.
I think thats it's really important to not rush a manicure if you want to come out the other end without any smudges. The best way to do this is to avoid using your fingers at all costs. Let's not forget - we can use this excuse to catch up on all of our favourite shows (The Big Bang Theory FTW!) without feeling too bad as we can kill 2 birds with 1 stone!

STEP 2: Remove all traces of nail polish.
Even if you don't have any on, give your nails a quick swipe with some nail polish remover to strip any oils on the surface of your nails. I know this sounds bad but it will help your nail polish to adhere and last longer.

STEP 3: (Trim), file, smooth, buff and polish your nails.
I love these 4-sided nail files, and you can get them super cheap anywhere. They really improve the surface of your nails and again help the nail polish to adhere, therefore making it last longer. I got mine for about £1 at superdrug and despite using it hundreds of times, its still going strong! I also like to get a nail brush and use it to clean the underside of my nails.

STEP 4: Use a cuticle oil.
I use one by OPI but really any will do. Try to avoid the actual nail area and massage the oil into your cuticles. It will moisturise them and keep them healthy :) Then I like to use one of those stick-things to push back my cuticles. If you need to, you can also trim your cuticles.

STEP 5: Add a base coat.
Depending on your nails, you can either use a normal base coat or a strengthening one. Due to the cold weather here in the UK and all the washing up I have to do - I like to use a strengthening one. Again, this will keep your nails healthy and make your nail polish last longer.

STEP 6: Add your colour!
Try and keep the coats thin, it will allow the coats to dry faster and you are less likely to smudge them! Depending on the polish, I usually like to add 2-3 coats of polish (this is Models Own 'Utopia'). Remember to let them completely dry!

STEP 7 (Optional): Add your second colour!
Try and keep the coats thin, it will allow the coats to dry faster and you are less likely to smudge them! Depending on the polish, I usually like to add 2-3 coats of polish (1-2 for a glitter polish, this one is Models Own 'Pink Fizz'). Remember to let them completely dry!

STEP 8: Add your top coat!
One coat of top coat should do. You can use any but my absolute favourite of all time is Seche Vite. It goes on smoothly, evenly and dries really quickly.

STEP 9: Clean your polishes.
Many people forget to do this, but it's really important! If you soak a cotton bud in nail polish remover and clean the tip of your polish bottle then it will remove any wet or dry polish and make the bottles a lot easier to open!

STEP 10: Apply a hand cream.
Finally, apply a hand cream to keep your hands lovely and moisturised. This really gives you the feeling of a top quality manicure, but for 1/10th the price and from your own home :). I personally like Soap & Glory's 'Hand Food'.

Et, Voila!

Hope you enjoyed!


Post a Comment